|
 |
Nadir
Shooting Techniques... |
|
Previous pages
shows you basic steps in shooting the nadir (downward shot).
When you're in a dimly lit room, location or night panorama shooting
the first concern I
have is the long exposure shot of the nadir.
Obviously, for this kind of
trick photography, a hand held shot is not an option.
|
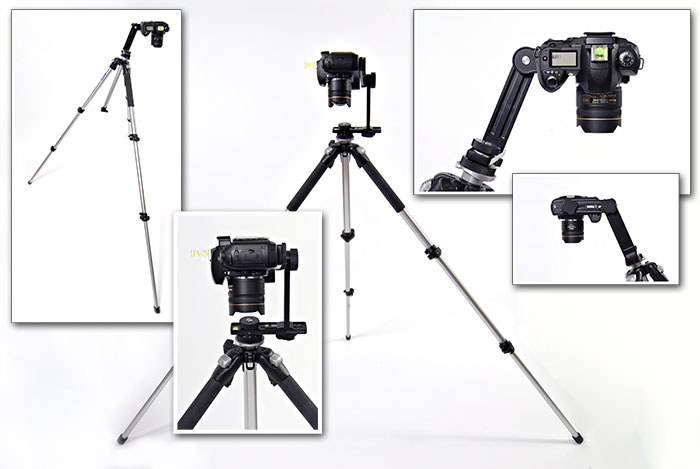
The following technique is shown
using the Nodal Ninja 3 VR head. This is also illustrated in
the
Nodal Ninja
3 review page.
NOTES:
1 - Remember to make a mental
note of the location of the nadir before reconfiguring the tripod.
I usually stand on the "nadir" or use an object to mark out the
spot.
2 - Make another mental note of
the height of the lens where the previous images where shot at to
properly set up the tripod.
3 - This set up is only possible
with a tripod that is capable of spreading its legs approximately
80° or more. These types of tripods are generally capable of
low level shooting. You only need to spread the two front legs
wider than normal.
4 - Use a hot shoe level to make
sure the camera is leveled.
5 - When adjusting how far to
tilt the tripod forward, be careful not to push too far. In a
windy location the tripod can tip over. Make sure there is
enough weight at the rear or simply use your hands to support the
tripod.
6- Slide the camera to its
farthest position on the upper arm.
7 - Adjust the center focusing
point of the camera to the center of the nadir that you've marked
out.
8 - Release the shutter via timer
or remote control.
CONS:
Due to the width of the two front
tripod legs, approximately 5 feet (depending on the size of your
tripod), this may not be possible in some locations.
PROS:
Great for long exposures.
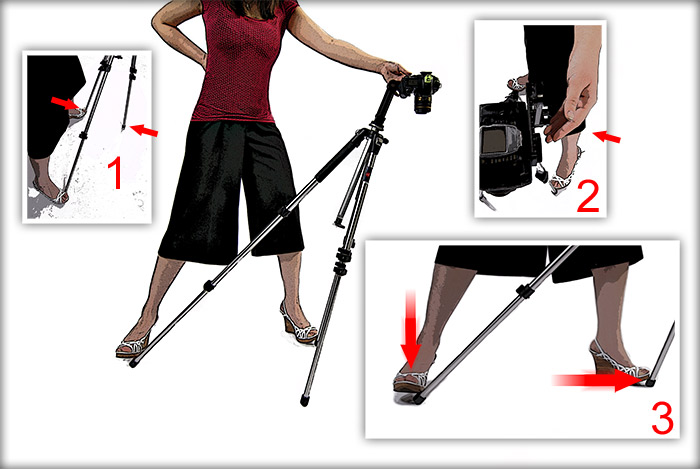
In
An alternative of the
technique above when space is limited.
|
Notes on the image
above:
1
- Adjust the two front tripod legs.
2
- In case the tripod's legs slips, ready your left hand
to catch the camera.
3
- The right foot is the main holding point. The
left foot prevents the front tripod legs from slipping
back. |
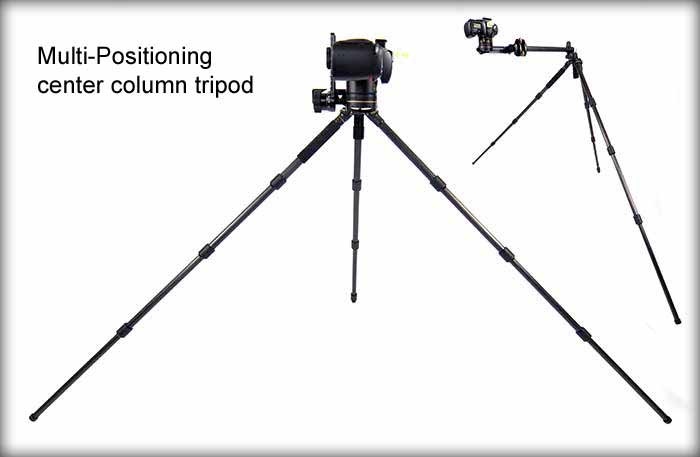
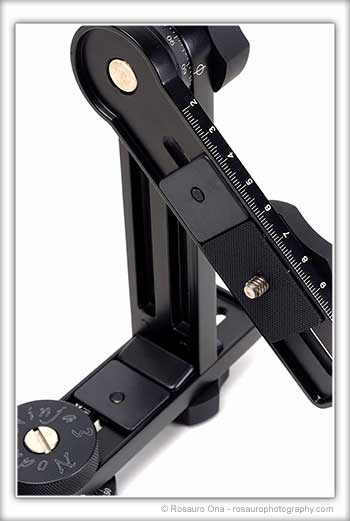
NOTES:
1 - Similar to the previous
technique, make a note of the center of the nadir and height
of the lens where the previous images were taken at before
reconfiguring the tripod.
2 - Use a hot shoe level to make
sure the camera is leveled.
3 - Notice the rear leg is
extended to it's second extension while the two front legs uses only
the first extension. This of course depends on how high you
want to shoot.
4 - Slide the camera to its
farthest position on the upper arm.
5 - Adjust the center focusing
point of the camera to the center of the nadir that you've marked
out.
6 - Release the shutter via timer
or remote control.
CONS:
If you're not careful, (1) there
is a possibility that the tripod may slip. (2) If you lose your
footage and/or balance, damage to your camera and/or lens is
inevitable. You've been
WARNED.
PROS:
Once familiar with this technique it is faster to set up than the
previous technique.
|
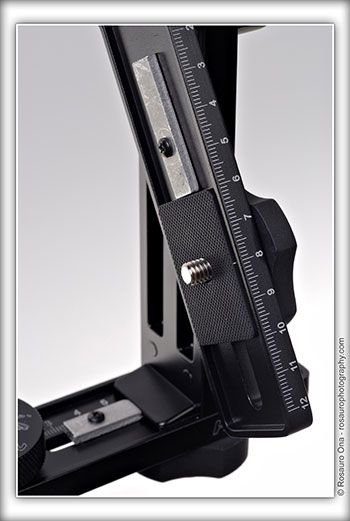
A quick tip...
The techniques above requires the
adjustment of the camera to it's
farthest position on the upper arm
of the Nodal Ninja 3.
To quickly reposition the camera back to the
entrance pupil setting, as
an aid, I've screwed in these
scrap metal to mark out the exact
location of the camera mount.
This may not be possible with some
VR heads.
|
|
Update - August 2007
Nick Fan, the inventor of the NN3,
added "Rail Stops".
|
An alternative tripod to
use... More details here
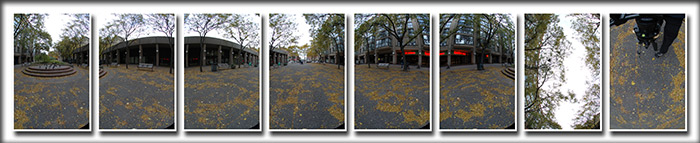
Sample shoot and
workflow of the technique
above
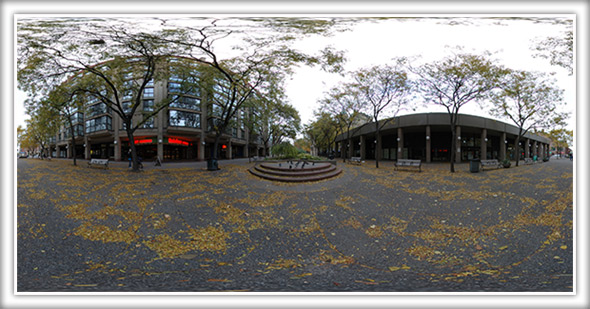
Take six pan shots
at every 60°, one upward (zenith),
and one downward shot (nadir)
with the tripod.
Above:
The alternative nadir shooting technique was
chosen here
as you can clearly see
the left foot.
In
PTGUI, add all the images excluding the nadir shot, generate control points and create
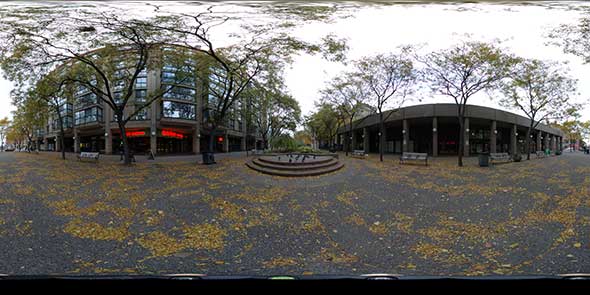
panorama.
First initial stitch
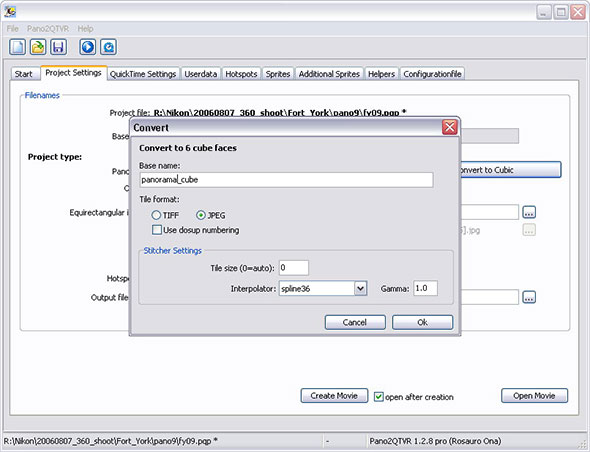
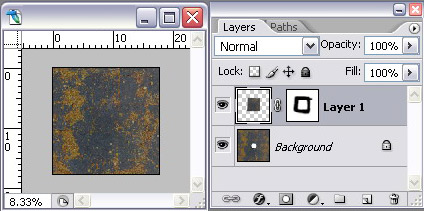
In PANO2QTVR,
convert the stitched image (equirectangular) to a cubical
projection.
The six cubical images generated with PANO2QTVR.
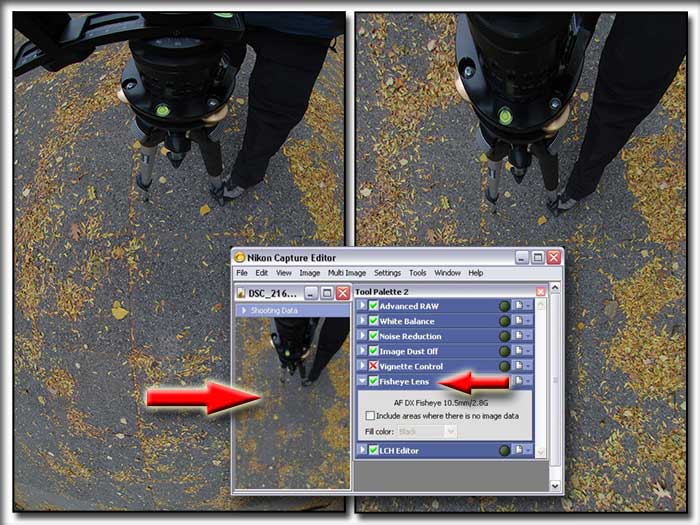
With Nikon Capture,
"defish" the nadir shot automatically with one click.
An alternative to Nikon Capture -
Defish with PTGUI
|
|
|
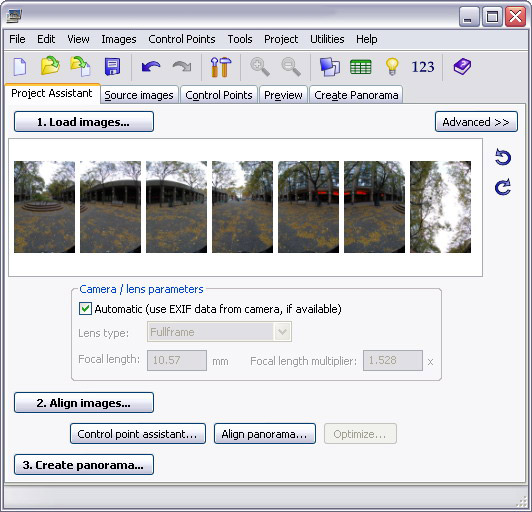
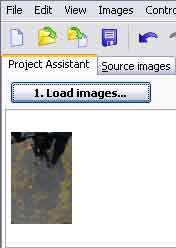
In
PTGUI load the nadir image. |
|
|
|
|
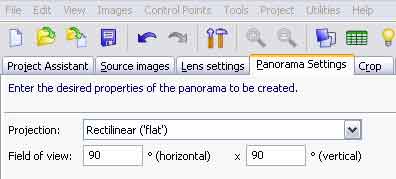
In
Panorama Settings tab set the following fields as shown. |
|
|
|
|
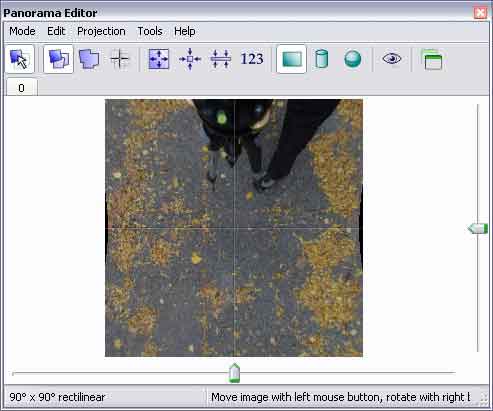
In
Panorama Editor you'll see the changes. |
|
|
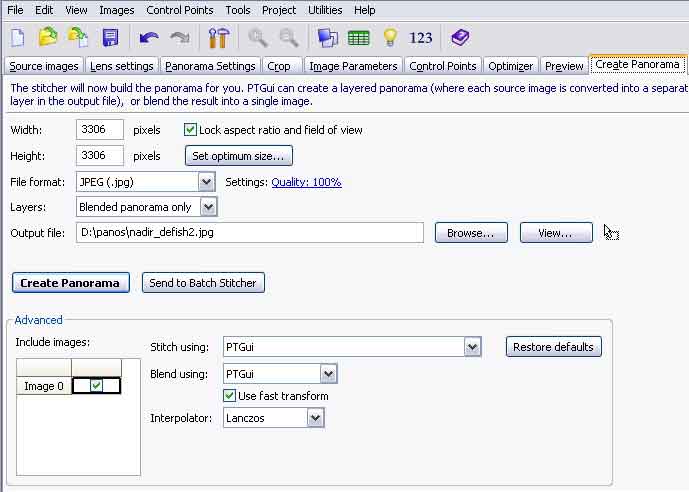
In Create Panorama
tab...
- Set optimum size to
maximum
- Choose JPEG or TIF
- Choose "Blended
panorama only"
-Choose output
location.
Then Create
Panorama...
|
|
|
|