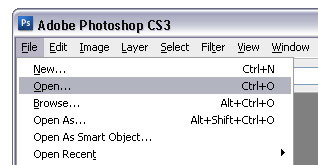
s

Home     Image Gallery      Panoramas     Links     Technical     About


h


Photoshop Basics


Topics covered:

File Browsing

Save and Close

Understanding Layers

Understanding Layer Mask


File Browsing


You have two options to open up your PSD file. 

1 - File open option on the Toolbar

2 - Adobe Bridge

On the Toolbar:

Click on File Open...


Keyboard shortcut:  CTRL + O


If you clicked on BROWSE...  This will open up Adobe Bridge - A separate file browser.  See image below.


Save & Close


Similar to all Windows software, "Saving" works the same way. 
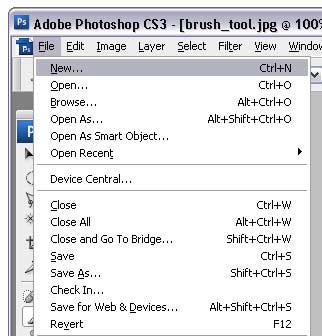
 

Close - Closes the current selected file.

Close All - Closes all opened files in the workspace.

Close and Go To Bridge... - Closes the current selected file and brings Adobe Bridge forward.


Save - Saves your current work

Save As... - When you want to specify a filename and/or file type.

Save a Version - Creates a new file in the workspace and makes it the current version.

Save for Web & Devices... - Saves the file optimized for the web.

Revert - Start from original file.


Understanding Layers


As the name implies.   Like layers of pancakes.  Yummmm!  Layers allows you to edit individual elements of an image and keep them separate from each other.


For example with the green triangle you can move it anywhere within the image area.  Make it invisible.  Add an effects layer.  Erase a part of it.  Add a layer mask.  Resize it.  Change its color.  Change its opacity.  Rename it.  Duplicate it.  Etc.


Understanding Layer Mask


Layer mask allows you to show or hide parts of a layer.   With layer mask the color black is to make a part of an image show through and the color white to hide.


Samples...


Below a layer mask was added to the green triangle.  The brush tool and the foreground color black were selected.  A triangle shape was brushed on the layer mask.  The area in the layer mask that has been brushed  with the color black shows the various shapes underneath. 


The gradient tool was used on the blue circle.  Foreground color black and background color white were selected and simply clicked and dragged vertically. 


On the red square a gray foreground color and the brush tool were selected.  With the different levels of gray different amounts of opacity can be achieved.  The same could be achieved by changing the opacity level of the brush and leaving the foreground color to a solid black.


Advantage of a layer mask is you can easily show or hide, without having to delete, parts of an image. 


For panoramas this is very useful when you want to blend from one image to another or when editing your equirectangular PSD file where layers were produced from your stitching software.


Below is a sample of a stitching software's layered PSD file output.  In this case PTGUI was used to create this.  Of course I colored in the layers to illustrate the position of the various images that make up the equirectangular image.


Notice layers 2 to 8's layer masks have all been filled in with a solid black.  This means none of these layers are showing.   To correct parts of the blended panorama all you have to do is use the brush tool, select white as the foreground color, select a layer and its layer mask and brush over the area of the layer mask you wish to show through.  Of course other manipulation of the layer can be applied.


Back to top